
Thursday, December 14, 2017
Beaded Thunderbird for Grandson
My grandson participates in Boy Scout ceremonies, so I beaded this Thunderbird wrist band for him.
 I used size 8 Toho seed beads and Ultrasuede ends. I wove with thread only for 3/8" at each end before gluing on the Ultrasuede ends. the Ultrasuede was 1 1/4" x 1 1/2" with the hole centered 1/4" from the fold. I used Zap glue on the thread selvages and E6000 on the leather. Let set for 24 hours. Leather string from Michael's. One G thread.
Christmas Bead Weaving: Minions
This Christmas bracelet is for my granddaughter who loves Minions. I made it on my Northwest Bead Loom, and the beads are size 8 Toho beads. Minion patterns are on Pinterest, and I added the Santa hats and made their overalls red.
 The Minions are Bob and Stuart. :) The beaded main portion is 4 1/2" x 1 1/2". I decreased on the loom using 4 rows of decreases per side, which adds about 1" in length and finishes at about 3/4".
Notes: 36 rows plus center and end rows = 39 rows = 4 1/2". 5 1/2" before clasp. New thread for clasp after weaving in all threads. Lobster clasp and made adjustable chain. 7 or 8 beads to attach clasp.

Notes: 36 rows plus center and end rows = 39 rows = 4 1/2". 5 1/2" before clasp. New thread for clasp after weaving in all threads. Lobster clasp and made adjustable chain. 7 or 8 beads to attach clasp.
Sunday, November 5, 2017
Spinning Wheel Pic for FCFG Facebook Page
I love this picture of a spinning wheel that I used to update the Franklin County Fiber Guild Facebook page.

The spinning wheel is a Jerry Jensen Traditional Production Wheel. Photo by Jennifer Donovan.

The spinning wheel is a Jerry Jensen Traditional Production Wheel. Photo by Jennifer Donovan.
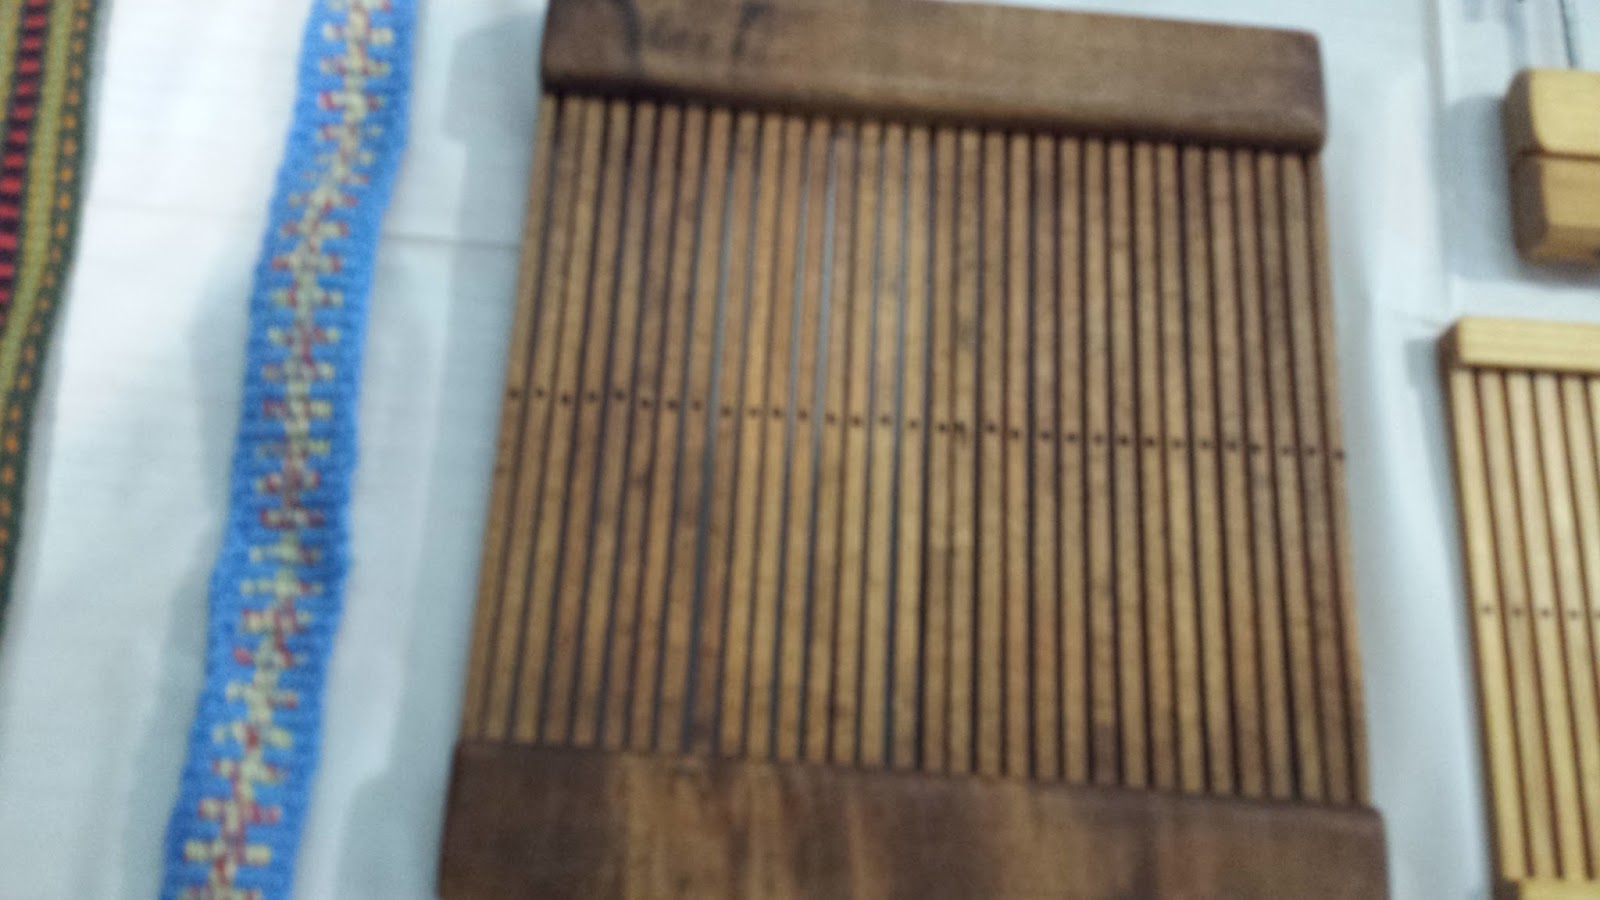
Elissa Parish Demonstrating Tape Loom Weaving
This
is Elissa Parish demonstrating tape loom weaving. "Tapes" (bands or
straps) were widely used in Colonial America to tie clothing, tie grain
bags closed, and many more uses. Tape looms were often made by the
husband for his wife or a father for his children. The loom was made by
Paul Parish.

I love my Paul Parish Tape Loom.


I love my Paul Parish Tape Loom.


Shetland PeerieMakkers--Carrying on the Knitting Tradition of Shetland
It's
so nice knitters in Shetland are carrying on their knitting traditions
by teaching it to school children. So interesting they use knitting
belts to hold one of the needles. Shetlanders call knitting "makkin" so
they call them "makkin belts".

Photo from the Shetland PeerieMakkers Facebook Page. Shetland PeerieMakkers is expanding to eventually teach bairns (children) in 28 primary schools all over Shetland. Jamieson's of Shetland is their yarn sponsor.
"PeerieMakkers" means small knitters in Shetland dialect. Knitting was once taught in school, but that ended in 2010, so volunteers are helping to keep the Shetland knitting tradition

The Gansey Girl Statue
This beautiful statue is called The Gansey Girl and is in Bridlington
Harbour in England. She is knitting a gansey while waiting for her
loved one to return from sea. A Gansey is a traditional patterned
"jumper" or sweater worn by fishermen for generations. The statue is by
Steve Carvill, and the old photo of a girl knitting by Frank
Meadow-Sutcliffe was his inspiration, circa 1880. It's a beautiful tribute to the
knitters and their fishermen families.


 I've been making posts for our Franklin County Fiber Guild Facebook Page of anything fiber-related that I find interesting, and I'm going to post some of my posts here on my own blog.


Wednesday, October 25, 2017
A Cozy Afghan for K
K loves her cozy afghan! I love the way it turned out.
 The yarn is Caron Cakes Mixed Berry color, and I used almost 5 cakes. The dimensions are 42" x 63". The pattern is called Feather and Fan Baby Blanket by Alexis Middleton, but I made it much larger than a baby blanket. I used a size H hook instead of the larger hook mentioned in the pattern.
 I cast on 187 stitches using the foundation crochet. I first tried 221 stitches, but it was too wide (about 50"). I'm really happy with this size. It will be very cozy this winter!


Halloween Crafts
I had fun making Halloween pillowcases and embroidering Halloween shirts for my granddaughters.


 The embroidery designs are from JuJu's.


Saturday, October 14, 2017
Weaving on a Beading Loom
I love my bead loom made by Tony Klissus of NW Looms. I'm making bracelets for my granddaughters for Halloween.


 I used size 8 beads and Nymo D thread. Cats bracelet: Narrowed on the loom. For the other two, I did square stitch after taking the piece off the loom. Instead of burying the threads for the skull bracelet, I pulled the loops so I had only 2 warp threads per side to weave in. I tried pulling the warp threads for the cat/pumpkin bracelet, but the Nymo thread wasn't cooperating. The skull bracelet pattern is available on Youtube. The cat bracelet patterns were on Pinterest.
I'm really enjoying making bracelets on the loom.


I'm really enjoying making bracelets on the loom.
Tuesday, September 26, 2017
Lined Drawstring Bags
I'm enjoying sewing fabric drawstring bags for my granddaughters. These are quick and easy to make. I used Jeni Baker's Tutorial from her blog, "In Color Order."
These are fully-lined bags, and you could add a pocket or two if you'd like. The pattern would make really nice knitting bags.


These are fully-lined bags, and you could add a pocket or two if you'd like. The pattern would make really nice knitting bags.


Monday, September 18, 2017
Wisconsin Sheep and Wool Festival 2017
This year was the 16th Annual Wisconsin Sheep and Wool Festival, and it was as wonderful as always. There's something for everyone who loves fiber arts, fiber animals, and fiber: lots of classes, vendors, competitions, sheepdog trials, sheep, and more.
The festival is held at the Jefferson fairgrounds, and the weather was perfect this year. Before the festival, we stopped in at Bon Ton Bakery for donuts. Bon Ton is celebrating their 100th year in business. Jefferson is surrounded by other small towns where you can find lots of nice shops and restaurants. The town gets into the spirit with yarn displays around lots of trees in the center of town.

 A display of old time tractors is featured near the entrance to the festival.
 I took a Celtic Cables class from Melissa Leapman, a well-known New York designer and author. We focused on knitting cables that can be inserted anywhere in a garment, so they weren't like a typical vertical cable. Melissa wore a beautiful sweater she made which featured a Celtic Cable on the back.
 Melissa's Celtic Cable Sweater
We learned to increase a lot at the base of the cable and to decrease back down to 1 stitch at the top of the cable. So, we increased from 1 stitch to 7 stitches for the cable. This ensures that the cable won't pull in so the garment will be the correct width. We worked on 2 samples in class, and I finished the 3rd large cable motif at home. I learned so much about reading a cable chart also.
 Samples 1 and 2 at the lower edge; sample 3 on top
 Sample 3 Finished
I also really enjoyed Nancy Shroyer's band weaving class using a rigid heddle. Nancy brought a beautiful paddle loom (knee loom) to show us made by Jonathan Seidel. Paddle looms were commonly used in Colonial America. She also brought an antique rigid heddle.
 Paddle Loom
 Antique Rigid Heddle
We worked on a simple plain band and a pick-up band. The rigid heddle is from Schacht and is like the segments of their variable heddle. It has 8 slots/holes per inch.
 Plain Band
 Pick-up Band
And of course, there were lots and lots of sheep.


 Unfortunately there weren't any lambs born at the festival this year. Most years, there are lots of newborn lambs. But, there was a month-old Shetland lamb.
 The Sheep Shearer, David, was busy shearing lots of sheep during the festival and explaining his method of shearing to the crowd.
 The festival is put on by over 100 volunteers, and they did a great job. It's a wonderful festival.
The festival is held at the Jefferson fairgrounds, and the weather was perfect this year. Before the festival, we stopped in at Bon Ton Bakery for donuts. Bon Ton is celebrating their 100th year in business. Jefferson is surrounded by other small towns where you can find lots of nice shops and restaurants. The town gets into the spirit with yarn displays around lots of trees in the center of town.


We learned to increase a lot at the base of the cable and to decrease back down to 1 stitch at the top of the cable. So, we increased from 1 stitch to 7 stitches for the cable. This ensures that the cable won't pull in so the garment will be the correct width. We worked on 2 samples in class, and I finished the 3rd large cable motif at home. I learned so much about reading a cable chart also.


I also really enjoyed Nancy Shroyer's band weaving class using a rigid heddle. Nancy brought a beautiful paddle loom (knee loom) to show us made by Jonathan Seidel. Paddle looms were commonly used in Colonial America. She also brought an antique rigid heddle.

We worked on a simple plain band and a pick-up band. The rigid heddle is from Schacht and is like the segments of their variable heddle. It has 8 slots/holes per inch.


And of course, there were lots and lots of sheep.


Monday, September 4, 2017
Guild Program: Stitch Markers!
Stitch markers are fun and easy to make. We'll be working on stitch markers for our Sept. program at our fiberarts guild. We'll make beaded stitch markers and add small charms, and we'll also make some stitch markers with letter beads.
 My Stitch Markers
If you make stitch markers, you'll need chain nose pliers, round nose pliers, and flush wire cutters to cut the wire or head pins. I also have a pliers to open split rings, which makes it so easy to open them. When I use jewelry wire for stitch markers, I use size 20 gauge wire from Michael's. If I use head pins, I use 3" head pins because the longer length makes it easier to make a wire-wrapped loop.
I bought the crystal and silver beads and charms at Michael's for the beaded stitch markers. I used 20 gauge wire and made a small loop at one end of the wire and attached the charm using the jump ring. I made a wire-wrapped loop at the top and added a split ring. You can use various size split rings depending on the size of your knitting needles, but I used size 9 mm split rings.
 Crystal Beads and Charms Stitch Markers
You can use wire or head pins to make the letter stitch markers. I used a size 6 seed bead before and after the letters to add some color, and it also makes sure the letters won't slip off a head pin.
 Letter Stitch Markers
Stitch markers can sometimes get accidentally knitted into your project. To keep this from happening, always have the stitch marker facing the side you are knitting. Then they will be much less likely to get caught into your stitch. This will be a fun guild program!

If you make stitch markers, you'll need chain nose pliers, round nose pliers, and flush wire cutters to cut the wire or head pins. I also have a pliers to open split rings, which makes it so easy to open them. When I use jewelry wire for stitch markers, I use size 20 gauge wire from Michael's. If I use head pins, I use 3" head pins because the longer length makes it easier to make a wire-wrapped loop.
I bought the crystal and silver beads and charms at Michael's for the beaded stitch markers. I used 20 gauge wire and made a small loop at one end of the wire and attached the charm using the jump ring. I made a wire-wrapped loop at the top and added a split ring. You can use various size split rings depending on the size of your knitting needles, but I used size 9 mm split rings.

You can use wire or head pins to make the letter stitch markers. I used a size 6 seed bead before and after the letters to add some color, and it also makes sure the letters won't slip off a head pin.

Stitch markers can sometimes get accidentally knitted into your project. To keep this from happening, always have the stitch marker facing the side you are knitting. Then they will be much less likely to get caught into your stitch. This will be a fun guild program!
Wednesday, August 30, 2017
Guild Program: Shawl Pins
I'm helping with programs for our fiberarts guild this year, and last month we made shawl pins. We had a great time. Using 12 gauge copper wire, we made shawl pins by using PVC pipe for mandrels and jewelry pliers to form the wire into pins. We then hammered the pins to add strength to the wire and to hold the wire into place. This tempers the wire, and you can add texture to the wire, too.
We made both a spiral shawl pin and a penannular pin. The spiral pin holds a knitted, woven, or crocheted shawl together simply by the wearer rotating the pin into place. It holds very well.
 Spiral Pin

The penannular pin, or brooch, is a pin that was used long ago to hold clothing together from the Roman period. It is also known as a Celtic brooch since it was used in Scotland and Ireland to hold cloaks and clothing together. "Penannular" means incomplete circle.
 Penannular Pin
The ring is turned to hold the pin in place.
 This was a really fun program.
We made both a spiral shawl pin and a penannular pin. The spiral pin holds a knitted, woven, or crocheted shawl together simply by the wearer rotating the pin into place. It holds very well.


The penannular pin, or brooch, is a pin that was used long ago to hold clothing together from the Roman period. It is also known as a Celtic brooch since it was used in Scotland and Ireland to hold cloaks and clothing together. "Penannular" means incomplete circle.

The ring is turned to hold the pin in place.

Saturday, July 15, 2017
Narrow Latvian Flower Band
This is a simpler Latvian Flower Band than the one I posted last year (Feb. 2016). This was the first inkle band I had made, and the pattern was from a Ravelry Winter Belt WAL (Weave along) in the Knit Like a Latvian group. The pattern is in the book Latviesu Jostas.
 Latvian Flower Band
This band has a single flower in the center, so it's easy to weave. The colors should be red, green, blue, and yellow. I didn't have red, so I used purple. I used Sugar 'n Cream. At the time, I didn't have any weaving threads. I like using size 3/2 weaving cotton now for inkle bands, and I think the pattern would look clearer. The yellow is so light, too--I would use a darker yellow.
I used purple for my shuttle thread (weft thread), but it should be red. Whatever you use for your weft thread will be the center color of the flower. If you look above, the flower is the horizontal purple line surrounded by the yellow petals.
There are 23 threads, and you warp the band as usual: heddled, open, heddled, open, etc. But, where you have a "doubled" thread, you can either use a heavier thread, or Two threads as One Thread. Make sure to heddle doubled threads together as one or leave them open together as one thread.
Here is the color order for warping: 2 red, 2 green, 2 yellow, 2 blue, 2 yellow, 1 doubled green, 1 yellow (this is center of band), 1 doubled green, 2 yellow, 2 blue, 2 yellow, 2 green, and 2 red.
So, you warp it like this: 1 red heddled, 1 red unheddled, 1 green heddled, 1 green unheddled, etc. You can start with a heddled thread or an open thread; it doesn't matter.
Weave several shots of plain weave--just as you weave a regular inkle band to begin the pattern.
Then for the pattern, you weave the band as usual except for the doubled threads.
*So, when you open the first shed for the pattern, if the green doubled threads are in the "down shed" pick them Up to the top and pass the shuttle through the shed. Then weave 2 shots of plain weave as usual.
Then open the next shed and the doubled green threads should be "up". Push them Down to the down shed and pass the shuttle through. Then weave 2 more shots of plain weave as usual.*
Repeat from * to * over and over for the length of the band. End with some rows of plain weave.
If you open your first shed for the pattern, and the green doubled threads are UP, then push them down and pass the shuttle through. Follow with 2 rows of plain weave. Then for the next row, open the shed and the green doubled threads should be Down. Pick them up and pass the shuttle through. Then follow with 2 rows of plain weave.
Repeat by either pushing down or pulling up the doubled green threads and passing the shuttle through and then do 2 rows of plain weave. And Repeat.

Saturday, July 8, 2017
Azzu's Shawl
The Fiber Arts Guild that I belong to is having a KAL (knit along). We're knitting Azzu's Shawl by Emma Fassio, which is free on Ravelry. It's a long shawl that can be twisted around the neck and knotted in front.
 Azzu's Shawl
I used Berocco Ultra Alpaca Light, which is a sport weight yarn. I had 3 skeins (432 yards), and I used most of it. I used a size 7 needle. Gauge was 5 stitches/inch in stockinette. The pattern calls for fingering weight yarn, but this will be a bit warmer.
 The shawl increases in width because every row increases at least 2 stitches on both the right side rows and the wrong side rows. I added 5 rows to the end of the shawl, which added two extra eyelet rows: Row 5, star row, row 5, star row, row 5.
I blocked the shawl on play mats with pins. It blocked out to 72 inches wide.
 I used the Russian bind off, which is also called Knitted Lace Bind off. This is a stretchy bind off, which allows you to block the shawl out easily.
You knit the first 2 stitches, then place the LH needle into the front of the 2 stitches and knit them together from that position (K2togBL). *Knit 1 stitch, place LH needle in the front of the two stitches, and knit them together from that position (knit 2 tog through back loop). Repeat across from *. Take the tail through the last stitch on the needle and then weave the tail in.
The worksheet that is available with the pattern is very helpful for checking off rows as you work them. It also provides stitch counts so you know you're on track.
I did a garter stitch tab to begin the shawl so it looks similar to the garter stitch edging around the edges of the shawl. Work 4 (or 5*) rows of garter stitch (Knit every row). Turn your knitting sideways and pick up and knit 2 stitches (one stitch per garter row). Turn sideways again and pick up and knit 2 stitches in the cast on edge. 6 stitches total. Begin on row 3. * Some directions say to knit 1 additional row before turning sideways. This makes it easier to turn sideways and pick up and knit the stitches in the garter stitch rows.
This was a fun Knit along!

I used Berocco Ultra Alpaca Light, which is a sport weight yarn. I had 3 skeins (432 yards), and I used most of it. I used a size 7 needle. Gauge was 5 stitches/inch in stockinette. The pattern calls for fingering weight yarn, but this will be a bit warmer.

I blocked the shawl on play mats with pins. It blocked out to 72 inches wide.

You knit the first 2 stitches, then place the LH needle into the front of the 2 stitches and knit them together from that position (K2togBL). *Knit 1 stitch, place LH needle in the front of the two stitches, and knit them together from that position (knit 2 tog through back loop). Repeat across from *. Take the tail through the last stitch on the needle and then weave the tail in.
The worksheet that is available with the pattern is very helpful for checking off rows as you work them. It also provides stitch counts so you know you're on track.
I did a garter stitch tab to begin the shawl so it looks similar to the garter stitch edging around the edges of the shawl. Work 4 (or 5*) rows of garter stitch (Knit every row). Turn your knitting sideways and pick up and knit 2 stitches (one stitch per garter row). Turn sideways again and pick up and knit 2 stitches in the cast on edge. 6 stitches total. Begin on row 3. * Some directions say to knit 1 additional row before turning sideways. This makes it easier to turn sideways and pick up and knit the stitches in the garter stitch rows.
This was a fun Knit along!
Subscribe to:
Posts (Atom)