Showing posts with label Loom. Show all posts

Thursday, September 3, 2020

 A Quick Project:  A Guitar Strap

It's fun to weave a guitar strap as a gift, especially for a granddaughter who will be taking guitar in her first year of high school.

So, I chose some fun colors:  purple, pink, yellow, and a bit of green, and found an online inkle loom generator to make my own pattern.  I'm using 3/2 weaving cotton, 77 threads.

                                 My Pattern using Purple, Pink, Yellow, and Green

                                                     Pattern Color Order

I love my Schacht inkle loom--it's very easy to warp and weave.  The inkle loom generator prints out the colors in order to warp the loom.  I use 5/2 cotton for my heddles, and I heddle one thread, unheddle the next, etc.  The inkle loom is a 2 shaft loom, which makes plain weave, unless you are using a pick-up pattern.
 

                                                        Beginning to Warp the Loom

It takes awhile to warp the loom, but the weaving is quite quick.
                                            

                                                   The Warped Loom, Ready to Weave

To begin, I put small sticks into the warp.  This gives me something steady to weave against to provide a firm surface. 

                                            Inserting Sticks into each Shed for 4 Picks

Next I weave a pick with my weft thread, which matches the outside thread color.  In the next shed, I place a needle with the needle top facing the tail of the weft thread.  Take the weft thread through this next shed also, leaving a small loop, and then place the tail thread into the needle, and pull it through to the other side.  

This will bury the tail thread.  I like to take it also through the loop of the weft thread.  Now pull each thread in opposite directions until the strap is the measurement you'd like it to be.  You shouldn't see any weft thread peeking through, and each warp thread should be nicely lined up.  I am making my strap 2" wide.  I have 77 threads in my warp.  Be sure to consistently check the width of the weaving to try to keep it uniform.

                                                         Making the Guitar Strap 2" Wide.

Here's what the weaving looks like in progress.  I will make the strap 60" wide and finish it with leather ends that I ordered from A Spinner Weaver. 
                                           

                                                        The Guitar Strap in Progress
This is a very quick and easy project.  I'll post a picture when the guitar strap is finished.

Saturday, August 18, 2018

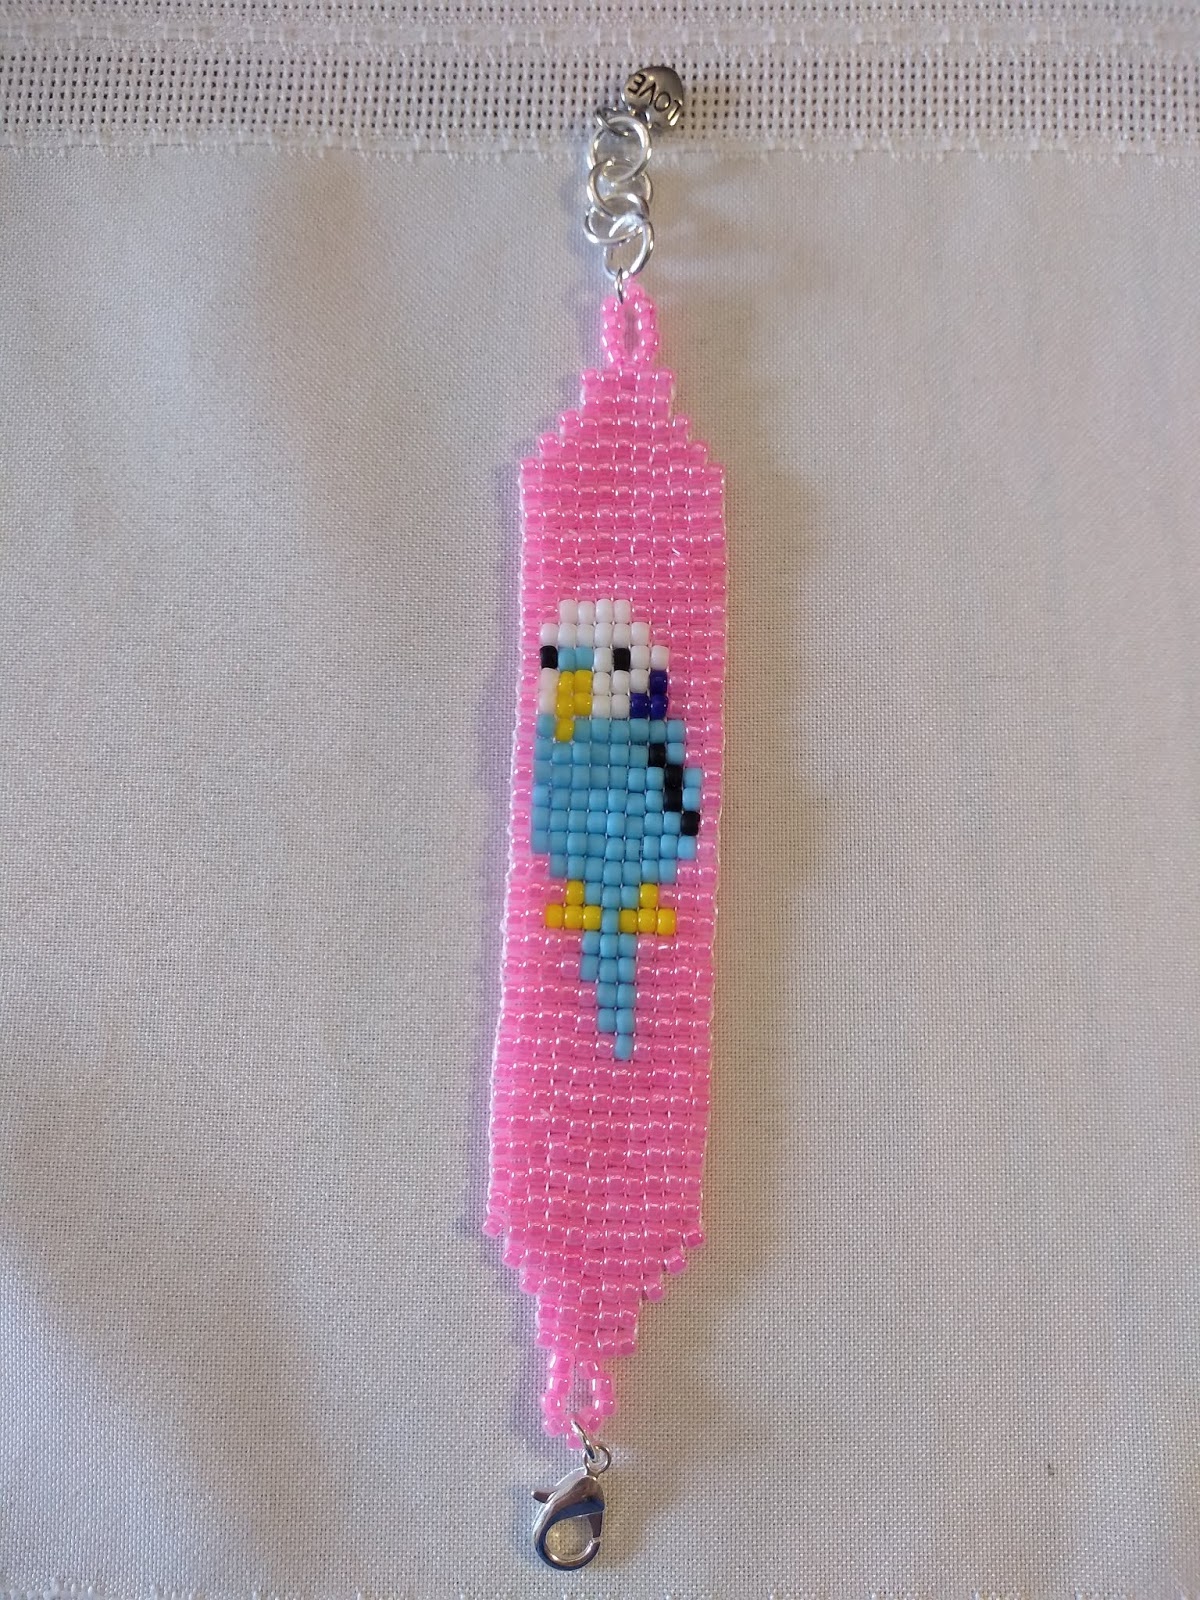
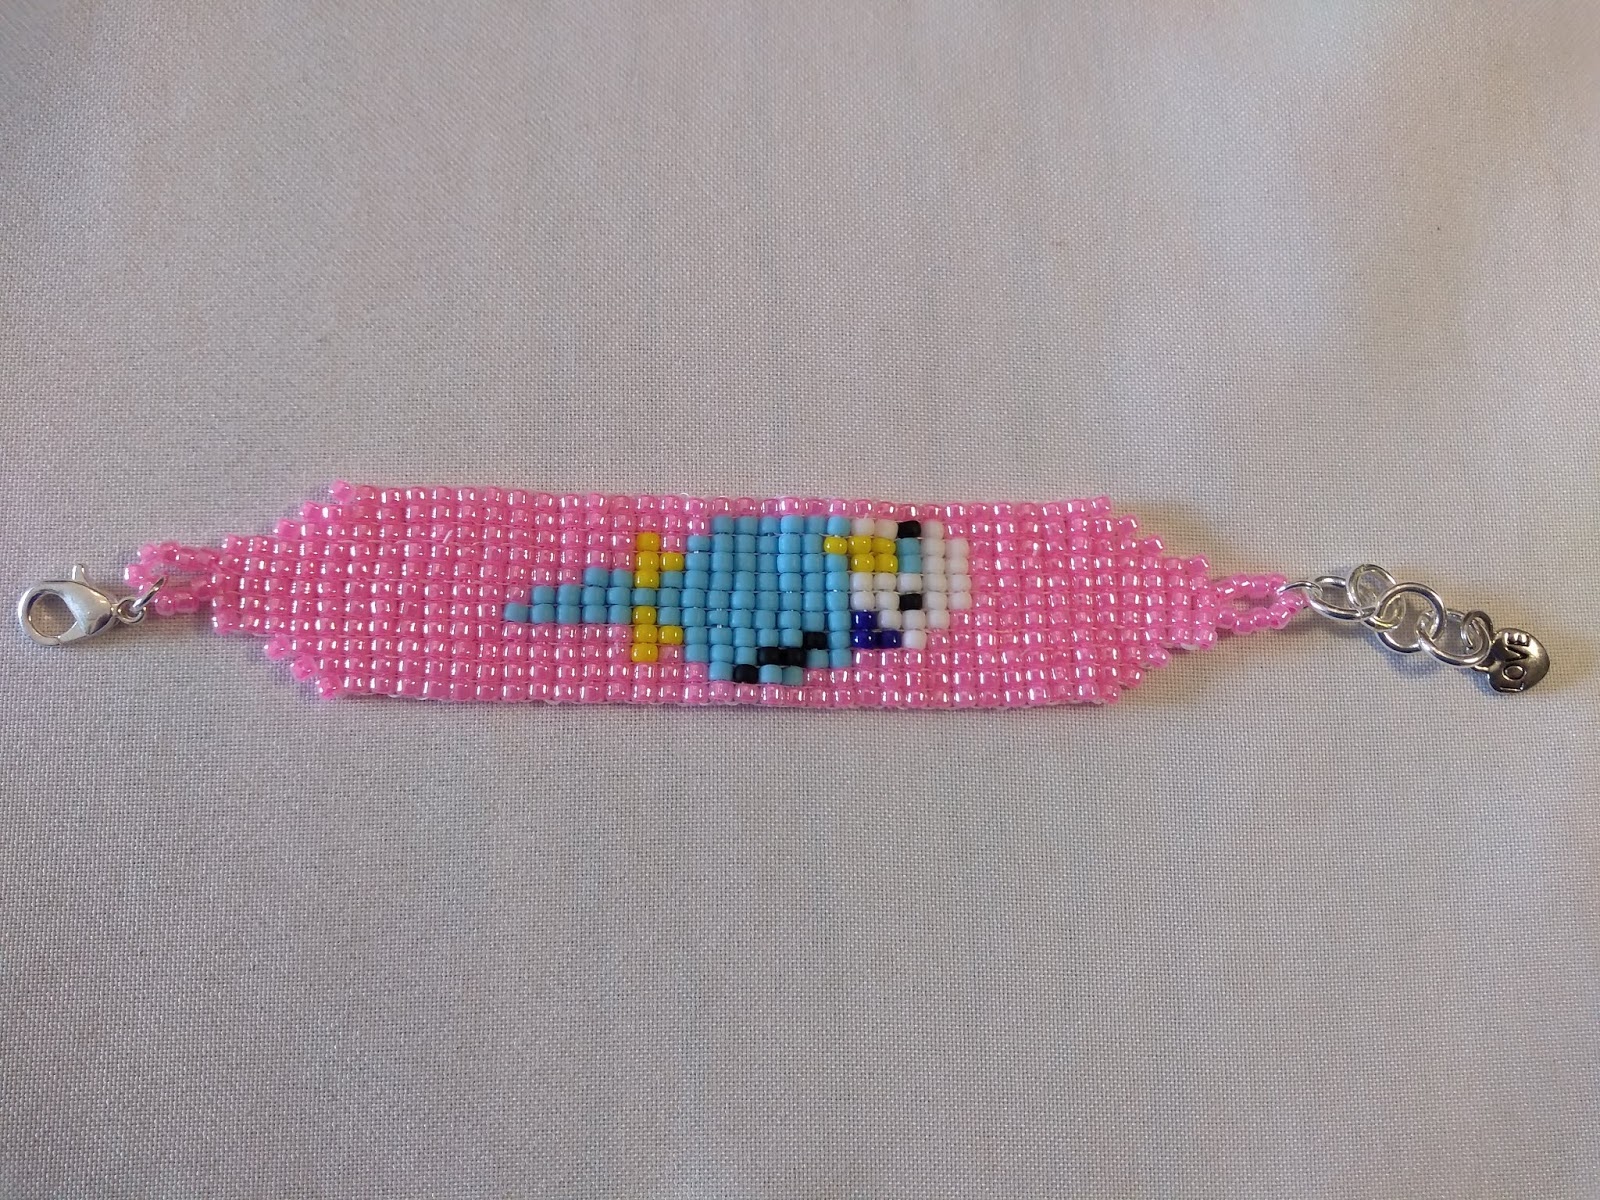
Parakeet Bead Loom Bracelet for my Granddaughter

My granddaughter has a parakeet named Chip, so I made her a bracelet with a parakeet that looks like Chip.  She helped weave a row of the bracelet, and her brother also wove a few rows.

I added an adjustable closure with a lobster claw.
My notes:  Light blue above beak.  Wrist size 5 1/4" for N.  Clasp adds about 1 1/4" so beads should be about 4 1/2".  Parakeet is 21 rows divided by 9 rows per inch, so 2 1/3".  4 1/2"= 4 x 9 = 36 + 4 =40 rows.  Decrease each side: 11-9-7-5 each side.  6 rows + 21 = 27.  40-27 = 13 rows so add 6 more rows per side before and after pattern.  Clasp: lobster and beads.  New thread, weave in well and come out center bead.  Make a chain of jump rings for one side.  Size 8 beads make a circle of 8 or 9 beads and add closed jump ring which chain is attached to. Other side: also about 8 or 9 beads with a jump ring attached to the lobster claw.  I used heavy duty jump rings from Hobby Lobby.  One G thread. When weaving in threads, I added a knot after weaving in about 10 rows and then went through a few more beads and cut thread.  Add a charm onto the last jump ring.  4 rings and a charm.

Thursday, June 30, 2016

Kessenich Loom Renovation--Almost There


Kessenich Loom Renovation
My Kessenich 1960's red oak loom is looking good!  It now has new rubber bumpers under the shafts, new shaft and lamm cords, new warp beam cords, a new apron and Texsolv apron cords, a new beater bar, a new wooden board under shaft 3 to replace a warped one, and a new brake cord. It has new inserted eye heddles and new reeds to replace the rusty one.  It has new Texsolv tie-ups for the treadles. The loom has 2 coats of Trewax furniture wax on it, and the metal pieces have been cleaned and oiled.

                                                       Kessenich Loom New Beater Bar

Kessenich Loom: Replacing Apron Strings with Texsolv Cord
I replaced the apron strings with Texsolv cord because it's so easy to make sure each cord is even when you use Texsolv.  The apron has a rod pocket for a stick with 5 holes in it.  I found a long strong upholstery needle to poke holes in the apron for the Texsolv cords.  At the apron, put the end of the Texsolv through itself and melt the end of the Texsolv so it won't unravel.  

To make holes in the cord for the apron stick or rod, simply fold the Texsolv about 5 holes from the end, and place the fold through the first hole in the Texsolv.  This will create a hole for the rod.  Make sure to melt the end of the Texsolv.

                                                 Texsolv Apron Cords for Apron Rod

Kessenich Looms: Removing the Front Beam
Bruce at Kessenich Looms said that the front beam is removable to make threading the heddles and reed easier.  After removing the front beam, the beater bar can be placed on the floor.  He said to make sure to tie the beater bar when folding the loom, but not too tightly because it has to be able to move a little.  Also, when removing the front beam, be careful that the beater bar won't fall.  He said he has repaired or replaced many beater bars because they can fall easily.


Tuesday, June 28, 2016

Kessenich Loom Renovation--Cords, Texsolv, and Apron

My Kessenich Loom Renovation is coming along nicely.  It's almost ready for weaving.

Replacing Warp Beam Cords
I replaced the warp beam old string with nylon cord, 1/16th inch diameter.  It wasn't easy to find strong nylon cord in this diameter, and a thicker cord won't fit through the holes.  Many of the cords from the local stores were too flimsy or too thick, so I bought the cord from Bruce at Kessenich Looms.  It's from McMaster-Carr and is 80 lb. test. In the picture, the old cord is on the right.

                              Kessenich 18 New Warp Beam Cords on Sectional Beam Turned Inward.

                                  Kessenich Loom with New Warp Beam Cords and Brake Cord

Replacing Chain Tie-ups with Texsolv Cord
I replaced the old chains on the treadles with Texsolv cord.  A problem with replacing the chains is that the lamms have holes in them, which originally had cut off cotter pins.  So, I could have installed the Texsolv cord by putting it through itself at the top of the lamms, but then the cord may have been rubbed against another lamm as they move up and down. 

So, I placed 1/4" dowels on the top of the lamms and put the Texsolv cords onto the dowels and through the holes of the lamms.  There are plastic anchor pegs available for Texsolv cords used in Swedish looms tie-ups that I ordered to try for the top of the lamms.  If the anchor pegs are the right size, I'll replace the dowels with the anchor pegs.

                                           Kessenich: Replacing Tie-up Chains with Texsolv Cord

To attach the Texsolv cord to the treadles, I used arrow pegs.  I will cut the Texsolv cord and melt the ends after I'm sure that the arrow pegs are in the right spot.  It's more difficult to have the shafts rise evenly because there are only 2 eyelets on each treadle, so the cords are slightly different lengths, depending on which shaft they are hooked up to.
                                        Kessenich:  Arrow Pegs attach Texsolv to Treadle

Cloth Apron
I also replaced the cloth apron, which I bought from Bruce at Kessenich Looms, but a new one could be made out of canvas or duck fabric.  It's not easy to get the apron on evenly because the holes in the metal pipe were not even all the way across.  So, we first put the apron over the pipe, placed the top and bottom boards over it and made sure the cloth was even at the edge.  Then we used an awl to punch a hole in the fabric and placed the screw in the top board and through the cloth.  We took it off the pipe for a moment to put the pipe onto the loom with the cloth brake and washer on the right side, and the washer on the left side.  Then we had to carefully place the top board, cloth apron, and screws into the holes (which you can't see) and through the bottom board.  It took 2 of us to install it evenly. It looks so much nicer now. 
         Kessenich: Apron temporarily installed to make sure apron is even before putting on loom

Testing the Shed
Before putting a warp on the loom, Bruce at Kessenich Looms suggested doing a test first.  The test is important because you don't want your shed to be so big that the top threads will interfere with another shaft.  Also, you want to see if the sheds appear even.  If they're not even or the shed is too large, you need to adjust your tie-ups to your treadles.  The shed should be about 1/2" or so below the top where it would interfere with another shaft. If your shafts are crooked, then the shaft or lamm cords need to be adjusted (the knots). 

                                                  Kessenich:  Testing the Loom Shed

To test the loom shed, put at least one thread through a heddle on each shaft and through the reed.  Clamp the threads to the front and back beams.  Tie up the treadles and press each treadle to check the shed.  Bruce said that holding the threads will not be accurate; you do need to clamp them to the front and back beams.

                                                       Kessenich:  Loom Shed Test

I think the Kessenich 1960s loom will be a really nice loom for weaving!